1. Fish Eyes (Silicone Contamination)
What They Look Like
Fish eyes appear as small circular craters in the wet paint film — typically 1–5mm across — where paint pulls away from a central contamination point. The crater has a raised rim and exposes the substrate or underlying coat in the center. They're most visible in the first coat of base or clear.
Root Cause
Silicone, oil, or wax contamination on the substrate surface. Common sources: WD-40 overspray in the shop, hand lotion transferred from skin, tire dressing aerosols, air tool oil mist from compressors, and silicone-based interior detail sprays. Even trace amounts — parts per million — cause fish eyes.
Prevention
Degrease thoroughly with a high-quality solvent-based wax and grease remover using the two-cloth method. Never use silicone-containing products anywhere near the spray area. Install a coalescing filter and desiccant dryer on your compressed air system — oil mist from the compressor is a common overlooked source. Dedicate separate cleaning cloths for pre-paint wipe-down and never cross-contaminate.
Fix
If caught in the first coat: stop spraying, let it flash, then sand the affected area with P600 wet. Re-clean, tack, and respray. If fish eyes appear in the final coat: sand the panel to P800, apply a barrier coat (adhesion promoter with anti-silicone additive), then reapply base and clear. In severe cases, add fish-eye eliminator (liquid silicone) to the paint — but this is a last resort as it masks the root cause.
Keep a dedicated "paint-only" set of microfiber towels stored in a sealed container. Label them. Never use the same towels for interior detailing or general shop cleanup. Cross-contamination is the #1 cause of fish eye outbreaks in busy shops.
2. Orange Peel
What It Looks Like
Orange peel is the wavy, dimpled texture resembling the skin of an orange. Under magnification, it's visible as a non-uniform film thickness where paint didn't flow out and level before curing. It's most apparent in clear coat but can affect basecoat too.
Root Cause
Inadequate atomization or poor flow-out. Causes include: gun pressure too low, fluid flow too high, gun distance too far, improper reducer/thinner selection (too fast for temperature), spraying too dry, or surface temperature too high causing the paint to set before it levels. Orange peel is fundamentally a viscosity problem — the paint film is too viscous to level before the solvents flash off.
Prevention
Set air pressure per gun manufacturer spec at the inlet (not the regulator — use a gauge at the gun). Choose reducer speed based on ambient temperature: slow reducer below 70°F, medium at 70–85°F, fast above 85°F. Maintain 6–8 inch gun distance with 50% overlap. Spray a medium-wet coat — not dry, not flooded. If your booth has good airflow, you can use slower reducers for better flow-out.
Fix
For mild orange peel: wet sand with P1500, then P2000, then P3000 trizact on a DA sander, followed by compounding and polishing. For severe orange peel: sand flat with P800–P1000, reapply 2 medium-wet coats of clear, then polish after cure. If orange peel is in the basecoat, you must sand it smooth before clearing — clear coat magnifies basecoat texture, it doesn't hide it.
Use a slower reducer than you think you need — especially with high-solids clears. Most orange peel in clears comes from reducers that are too fast for conditions. Slower reducer = more flow-out time = flatter finish. Just watch for runs.
3. Runs & Sags
What They Look Like
Runs are vertical drips or curtains where excessive paint flowed downward under gravity before curing. Sags are the early stage — a thickened area that's starting to droop but hasn't dripped yet. Both are most common on vertical panels.
Root Cause
Too much material applied in one coat. Contributing factors: gun moving too slowly, excessive fluid flow, reducer too slow (paint stays wet too long), gun angle tilting downward causing uneven deposition, or spraying too close to the panel. Booth temperature above 90°F can also cause the top of the film to skin over while wet paint underneath continues to flow.
Prevention
Apply multiple medium coats instead of one heavy coat. Maintain consistent gun speed — approximately 1 foot per second. Reduce fluid flow 10–15% on vertical panels. Flash each coat fully before applying the next. If you see sagging starting, stop immediately — don't try to "blow it flat" with the gun. Wait for it to flash, then assess.
Fix
For small runs: let the paint fully cure (24+ hours for 2K clears), then use a nib file or razor blade held at 90° to shave the run flat. Block sand with P800, then P1500, then polish. For large runs or runs in basecoat: sand out completely and respray the panel. Never try to sand out a run in fresh paint — it will load your sandpaper and smear.
4. Dust Nibs
What They Look Like
Tiny raised bumps, typically 0.1–0.5mm, embedded in the paint film. Visible as small specks under raking light. Run your clean hand over a cured panel — nibs feel like fine sandpaper grit.
Root Cause
Airborne dust and dirt settling on wet paint. Sources: dirty spray environment, clothing fibers, sanding dust from adjacent work, unfiltered makeup air, or dirty compressed air. Even in clean booths, static electricity on plastic panels attracts airborne particles like a magnet.
Prevention
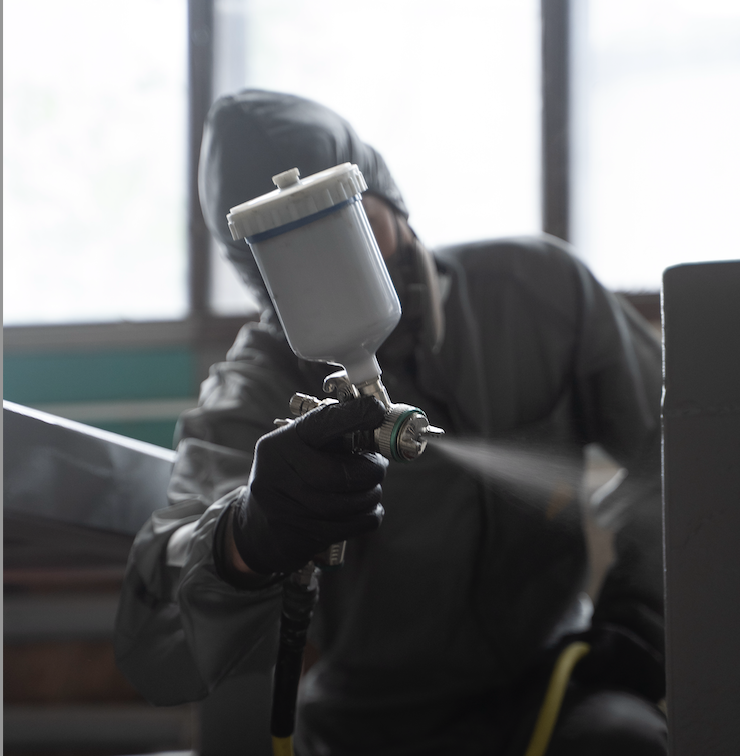
Spray inside an inflatable paint booth with positive pressure and intake filtration. Wet the floor before spraying to trap settled dust. Wear a clean paint suit — never wear street clothes in the booth. Use an anti-static gun or ionizing air blower on plastic panels. Keep the booth sealed and avoid entering/exiting during painting.
Fix
After full cure, de-nib with P1500–P2000 wet sanding on a small block. Touch only the nib, not the surrounding paint. Compound and polish to restore gloss. For nibs in basecoat: sand with P800 before clearing. Multiple nibs in clear coat may require a full cut-and-buff (P1500 → P3000 → compound → polish).
5. Solvent Pop (Pinholing)
What It Looks Like
Tiny craters or pinholes, often clustered, visible after the paint cures. Under magnification, they look like tiny volcanoes — solvent burst through the cured skin. Unlike fish eyes, solvent pop holes are typically smaller (0.1–0.3mm) and don't have raised rims.
Root Cause
Trapped solvents trying to escape after the surface has skinned over. This happens when: coats are applied too heavily without adequate flash, reducer is too fast for booth temperature (solvents "pop" through), or the booth temperature is too high causing rapid surface cure. Solvent pop almost always originates in the primer or basecoat layer, then breaks through the clear.
Prevention
Allow proper flash time between coats (10–15 minutes minimum at 70°F with 2K products). Don't pile on thick coats — multiple medium coats flash better than one heavy coat. Use the correct temperature reducer. Control booth temperature; ideal spraying range is 68–77°F. If you smell solvent from the panel during flash, it's not ready for the next coat.
Fix
Solvent pop in the basecoat: the panel must be sanded down to eliminate all pinholes (P400–P600), then reprimed and repainted. Solvent pop only in clear: wet sand with P800 until pinholes disappear, then re-clear. If pinholes extend into the basecoat or primer, full strip and respray is the only reliable repair. There's no shortcut for solvent pop that runs deep.
Solvent pop is most common in the first clear coat applied after basecoat. The trick: apply a light "tack coat" of clear first, let it flash for 5–7 minutes, then apply your first full wet coat. The tack coat creates a semi-permeable barrier that lets basecoat solvents escape slowly without popping through the full wet film.
Key Takeaways
- Fish Eyes: Caused by silicone/oil contamination. Prevent with strict degreasing and dedicated paint-only tools
- Orange Peel: Atomization/flow-out issue. Fix with correct gun pressure, reducer speed, and technique
- Runs/Sags: Too much material. Apply multiple medium coats, reduce fluid on vertical panels
- Dust Nibs: Airborne contamination. Use a positive-pressure inflatable booth and wet the floor
- Solvent Pop: Trapped solvents. Use correct reducer, allow proper flash, apply a tack coat before wet coat
Eliminate Dust Nibs at the Source
Sewinfla inflatable booths feature EPA-grade filtration and positive pressure — the single biggest step you can take to eliminate contamination defects.
Learn More