Daily Cleaning Routine
Overspray doesn't announce itself — it accumulates silently on walls, floor, and filter faces, hardening into a rough film that traps dust and degrades fabric flexibility. A 5-minute post-spray cleaning protocol prevents this from becoming a problem that requires chemical stripping later.
Begin with a dry microfiber wipe-down of all interior surfaces while overspray is still loose (within 30 minutes of spraying). Use a tack cloth on horizontal surfaces — the floor takes the most fallout. Follow with a damp (not wet) microfiber cloth using warm water only; avoid solvents on PVC fabric as acetone, lacquer thinner, and MEK will attack the plasticizer and cause embrittlement. For stubborn overspray that has already hardened, use a plastic razor blade at a low angle — never steel scrapers. Inspect the fiberglass pre-filter face visually: if it shows a uniform paint-colored coating across more than 60% of its surface area, it's time to replace it (see Filter Replacement Schedule below).
Finish by running the blower for 5 minutes with the booth empty to purge residual solvent vapor. This prevents overnight VOC accumulation that can degrade zipper lubricants and elastic components.
Keep a dedicated booth-only cleaning kit: two microfiber cloths (one dry, one damp), plastic razor blades, a handheld LED inspection light, and a Sharpie for dating filter installs. Store it in a sealed bag inside the booth — contamination from shop rags used elsewhere is a common source of silicone and wax contamination that causes fisheyes in finish coats.
Filter Replacement Schedule
Filters are consumables, not lifetime components. Running saturated filters is the number one cause of reduced booth pressure, poor overspray extraction, and solvent odor breakthrough. A disciplined replacement cadence eliminates these variables.
Fiberglass Pre-Filter
The pre-filter captures overspray particulates (10–50 micron range) and should be replaced every 3–5 full spray jobs, or sooner if visible loading exceeds 60% surface coverage. A loaded pre-filter increases static pressure at the blower intake, reducing CFM delivery and booth inflation pressure. Symptoms of a clogged pre-filter include: sagging booth walls during spraying, visible overspray haze lingering longer than 15 seconds, and the blower motor running hotter than normal (check the housing temperature by hand — if it's uncomfortable to touch for more than 3 seconds, airflow is restricted). Replace pre-filters proactively; they cost under $15 and the alternative is poor paint finish quality.
Activated Carbon Filter
The carbon filter adsorbs solvent VOCs through physical surface binding on the carbon pore structure. Saturation is a chemical endpoint — once all available adsorption sites are occupied, breakthrough occurs and solvent odors become detectable at the exhaust. Service life is measured in total solvent mass processed, not calendar time. For a typical automotive refinish using 2–3 quarts of solvent-based basecoat and 1 quart of clear, expect 8–12 spray sessions per carbon filter. Heavier applications (industrial coatings, gelcoat, multiple full resprays per day) may saturate a filter in 4–6 sessions.
The definitive saturation test: after a spray session, walk to the exhaust side and smell the exiting air directly. If you detect solvent odor — even faintly — the carbon bed is saturated and must be replaced. Do not attempt to "stretch" a saturated filter; breakthrough means VOCs are being released unfiltered, defeating the purpose of the booth.
Write the install date and job count on the filter frame with a Sharpie. This removes guesswork and lets you track whether a particular paint system (e.g., high-solids clear) is saturating filters faster than expected. Adjust your replacement interval based on data, not intuition.
Fabric Care & Tear Repair
The booth envelope — whether 210D Oxford, 420D Oxford, or PVC-laminated fabric — is a structural membrane under continuous tension during operation. Fabric care is structural maintenance, not cosmetic.
Clean fabric panels quarterly with a pH-neutral cleaner (Simple Green diluted 10:1 or dedicated fabric cleaner) using a soft-bristle brush. Rinse thoroughly with low-pressure water; high-pressure washers can force water into seam stitching and delaminate the waterproof backing. Allow to dry completely — at least 24 hours in warm conditions — before folding. Moisture trapped in folded fabric breeds mildew that permanently degrades the polyurethane or PVC coating.
Small tears (under 2 inches) can be field-repaired with PVC-compatible repair tape or patches. Clean the area with isopropyl alcohol, apply the patch 1 inch beyond the tear on all sides, and use a roller to eliminate air bubbles. For Oxford fabric booths, use a fabric-specific repair kit with polyurethane adhesive; standard duct tape will fail within days due to solvent exposure. Tears larger than 2 inches, tears at seam lines, or tears in high-tension areas (near inflation duct attachments) warrant panel replacement — contact Sewinfla for replacement panel availability. A compromised seam under inflation pressure can propagate to catastrophic failure in seconds.
Inspect all fabric panels before every spray session during your pre-job checklist. Run your hand along seam lines feeling for thread separation, and shine a bright light from inside the booth to spot pinholes (they'll appear as bright dots from outside). Pinholes can be sealed with a dab of clear PVC cement.
Blower Maintenance
The blower is the heart of the system — it runs continuously for hours during spray sessions and must deliver rated CFM against the static pressure of the filter stack. A poorly maintained blower loses efficiency gradually, and the first symptom is usually a booth that doesn't inflate fully or sags during spraying.
Impeller Cleaning
Paint overspray that bypasses the pre-filter (or enters when the filter seal is compromised) accumulates on the blower impeller blades. Even a 1–2mm coating on blade surfaces reduces aerodynamic efficiency by 15–25%. Clean the impeller every 20 operating hours or monthly, whichever comes first. Disconnect power, remove the intake guard, and use a plastic scraper followed by a solvent-dampened rag (mineral spirits, not acetone) to remove buildup. Balance is critical — remove material evenly from all blades to avoid introducing vibration.
Motor Inspection
Inspect the blower motor housing for dust accumulation in cooling fins. Overheating is the primary failure mode for continuous-duty blower motors; blocked cooling fins reduce heat dissipation by up to 40%. Use compressed air (30 PSI max) to blow out motor housing vents. Check electrical connections for corrosion — spray environments are high-humidity and solvent vapor accelerates terminal oxidation. Apply dielectric grease to connections annually.
Bearing Lubrication & Unusual Noises
Most Sewinfla blowers use sealed bearings that do not require field lubrication. However, if your blower has grease fittings (check the motor nameplate), apply 2–3 pumps of NLGI #2 lithium grease every 500 operating hours. Listen for bearing wear indicators: a high-pitched whine that changes pitch with blower speed suggests dry bearings; a rhythmic knocking or rumbling indicates bearing race damage requiring immediate replacement. Do not operate a blower with failing bearings — a seized blower mid-spray means zero airflow, zero pressure, and a booth collapse onto wet paint.
Zipper & Velcro Care
Zippers and Velcro closures are the highest-cycle mechanical components on an inflatable booth. A typical entry zipper is operated 4–6 times per spray session (enter, exit between coats, final exit). Over 100 sessions, that's 400–600 cycles — and zipper failure means you can't seal the booth.
Lubricate zippers monthly with a dry silicone spray or dedicated zipper lubricant. Apply to the zipper teeth only — never to fabric, as silicone contamination causes fisheyes in paint. Work the zipper fully open and closed 3–4 times after application to distribute lubricant. If a zipper begins to separate behind the slider (teeth not interlocking), the slider has worn and must be replaced — continued use will damage the zipper tape, turning a $5 slider replacement into a panel replacement.
Velcro hook-and-loop closures accumulate overspray dust and fabric fibers that reduce holding strength. Clean Velcro hooks with a stiff nylon brush (a dedicated toothbrush works well) to remove debris from the hook side. If loop-side fibers are matted down, gently raise them with a wire brush. Replace Velcro strips when holding strength drops below 50% of original — a weak closure on an exhaust port can blow open under pressure and dump unfiltered air.
Storage Best Practices
How you store the booth between jobs directly determines its service life. Improper storage causes more damage than spraying ever does — the portability guide sets out the pack-down and storage routine by size class. — moisture, compression creases, heat, and pests are the four enemies.
Folding Technique
Never fold the booth along the same crease lines repeatedly — fabric fatigue at crease points leads to coating cracks and pinhole leaks. Use the "loose roll" method: fold the booth in thirds lengthwise, then roll (don't fold) from one end to the other. Alternate the starting end each time you pack it away. For PVC booths, avoid folding at temperatures below 50°F (10°C) — cold PVC is brittle and will crack along fold lines.
Moisture Prevention
The booth must be bone-dry before storage. Any moisture trapped in folds creates an anaerobic environment where mildew colonies establish within 48 hours. Mildew permanently stains and degrades the fabric's waterproof PU coating. If you must pack the booth while damp (rain interruption), unpack and fully dry it within 24 hours. Store with 2–3 silica gel desiccant packs in the storage bag; replace them quarterly.
Temperature Limits
Store between 40°F and 100°F (4°C–38°C). Below freezing, PVC plasticizers can crystallize, causing the fabric to become brittle and crack when unfolded. Above 120°F (49°C) — achievable in a closed vehicle or storage container in summer — the PVC can soften and permanently deform under its own weight. Attics and metal shipping containers are not suitable storage locations without climate control.
Pest Protection
Rodents and insects are attracted to the booth fabric's residual paint odors. Mice will chew through Oxford fabric in under 30 seconds to nest inside. Store the booth in a sealed heavy-duty storage bag (the original Sewinfla bag is rodent-resistant but not rodent-proof). For long-term storage, place the bagged booth inside a rigid plastic tote with a snap-lock lid. Add a cotton ball with a few drops of peppermint oil — a natural rodent deterrent — refreshed monthly.
What the published rules require you to clean, and how often
Two federal clauses set the cleaning cadence for a spray area: surfaces must be kept as free from accumulated combustible residue "as practical," with cleaning conducted daily if necessary, and the contents of waste cans holding coating-soaked rags must be disposed of at least once daily or at the end of each shift. Filter media carries its own, stricter disposal rule.
- Cleaning cadence — 1910.107(g)(2): "All spraying areas shall be kept as free from the accumulation of deposits of combustible residues as practical, with cleaning conducted daily if necessary." The same paragraph requires scrapers, spuds and other cleaning tools to be of nonsparking material — on a coated fabric or panel surface that means a plastic or wooden scraper, not a steel one.
- Residue and rag disposal — 1910.107(g)(3): "Residue scrapings and debris contaminated with residue shall be immediately removed from the premises and properly disposed of," and "approved metal waste cans shall be provided wherever rags or waste are impregnated with finishing material," with their contents "properly disposed of at least once daily or at the end of each shift." A plastic pail of solvent rags left in the corner overnight is precisely the situation this paragraph exists to prevent.
- What you may clean with, and where — 1910.107(g)(5): cleaning solvents are restricted to those "having flashpoints not less than 100 °F," except that spray nozzles and auxiliary equipment may be cleaned with the solvents normally used in the spray operation. The paragraph then closes the loop: "Such cleaning shall be conducted inside spray booths and ventilating equipment operated during cleaning." Gun cleaning on an outside bench with the blower switched off is the practice this sentence rules out — the ventilation has to be running.
- Filter disposal is a same-day rule — 1910.107(b)(5)(ii): "All discarded filter pads and filter rolls shall be immediately removed to a safe, well-detached location or placed in a water-filled metal container and disposed of at the close of the day's operation unless maintained completely in water." A loaded particulate or carbon pad is not general shop waste to be left in the booth until the next job.
- Never share one filter set between coating chemistries — 1910.107(b)(5)(vi): filters and filter rolls "shall not be alternately used for different types of coating materials, where the combination of materials may be conducive to spontaneous ignition." Paragraph (g)(6) applies the same logic to the enclosure itself: a booth "shall not be alternately used for different types of coating materials" unless all deposits of the first material are removed from the booth and the exhaust ducts before the second is sprayed. For a shop running more than one chemistry, that means dedicated filter sets and a documented changeover clean — a maintenance cost that belongs in the job quote.
- The filter plenum is part of the fire plan — 1910.107(b)(5)(iv): space inside the booth on the downstream and upstream sides of the filters is required to be protected with approved automatic sprinklers. For a portable fabric booth that provision is normally satisfied by the host building plus a placement, egress and alarm plan agreed with the local fire marshal — which is why siting the booth is a maintenance decision and not only a layout one.
- Worker-side housekeeping — 1910.107(g)(4) and 1910.107(g)(7): spray-finishing employees' clothing "shall not be left on the premises overnight unless kept in metal lockers," and "no smoking" signs in large letters on a contrasting background must be conspicuously posted at all spraying areas and paint storage rooms.
Sources checked 2026-09-23: OSHA 29 CFR 1910.107, clauses (g)(2) through (g)(7), (b)(5)(ii), (b)(5)(iv) and (b)(5)(vi), read in full at osha.gov. Clause text quoted from the published standard; no secondary summary or search-engine snippet was used.
Pre-Job Inspection Checklist
Run this 10-point checklist before every spray session. It takes under 3 minutes and catches the failures that ruin paint jobs:
- Fabric integrity: Visual sweep of all panels for tears, pinholes, or seam separation. Pay special attention to corners and inflation duct attachment points.
- Zipper function: Test every zipper — entry, exhaust, and accessory ports. Confirm full closure without separation behind the slider.
- Pre-filter condition: Check loading percentage. Replace if over 60% surface coverage or if visibly caked with overspray.
- Carbon filter status: Note job count since last replacement. If approaching saturation threshold (8–12 jobs), have a spare on hand.
- Blower intake clear: Verify the blower intake grille is unobstructed. Remove any debris, leaves, or plastic sheeting that may have been drawn toward the intake.
- Blower sound check: Run the blower for 10 seconds before connecting to the booth. Listen for unusual noise — grinding, whining, or rhythmic knocking. A healthy blower produces a smooth, consistent hum.
- Inflation test: Connect and inflate the booth fully. Verify walls are rigid with no sag zones. Time to full inflation should match baseline (typically 60–90 seconds for a standard booth). Longer inflation times indicate filter restriction or blower degradation.
- Positive pressure verification: Perform the tissue test at a seam or zipper — tissue should be pushed away from the booth, confirming positive internal pressure.
- Grounding continuity: If using grounded booth components, verify electrical continuity with a multimeter. Static discharge in a solvent-rich environment is a fire hazard.
- Interior cleanliness: Final walk-through with LED inspection light. Wipe any dust or debris from floor and lower walls. Even a single stray fiber can land in clear coat and require sanding out.
Print this checklist on a laminated card and hang it inside your shop. Check off each item with a dry-erase marker before every session. Over time, this builds a maintenance log that reveals patterns — for example, if you notice pre-filters loading faster in humid months, you can preemptively shorten your replacement interval for summer spraying.
Key Takeaways
- Daily 5-minute wipe-down and post-spray blower purge prevents overspray accumulation and VOC degradation of components
- Replace fiberglass pre-filters every 3–5 jobs; replace carbon filters at first sign of exhaust solvent odor (typically 8–12 sessions)
- Clean fabric quarterly with pH-neutral cleaner; repair tears under 2" with PVC-compatible patch tape; replace panels for larger damage
- Clean blower impeller monthly; inspect motor cooling fins and electrical connections; address bearing noise immediately
- Lubricate zippers monthly with dry silicone; replace worn sliders before they damage zipper tape; clean Velcro hooks with stiff nylon brush
- Store bone-dry using the loose-roll method; keep between 40°F–100°F; use sealed rigid containers with desiccant and rodent deterrent
- Run the 10-point pre-job checklist every session — 3 minutes of inspection prevents days of rework
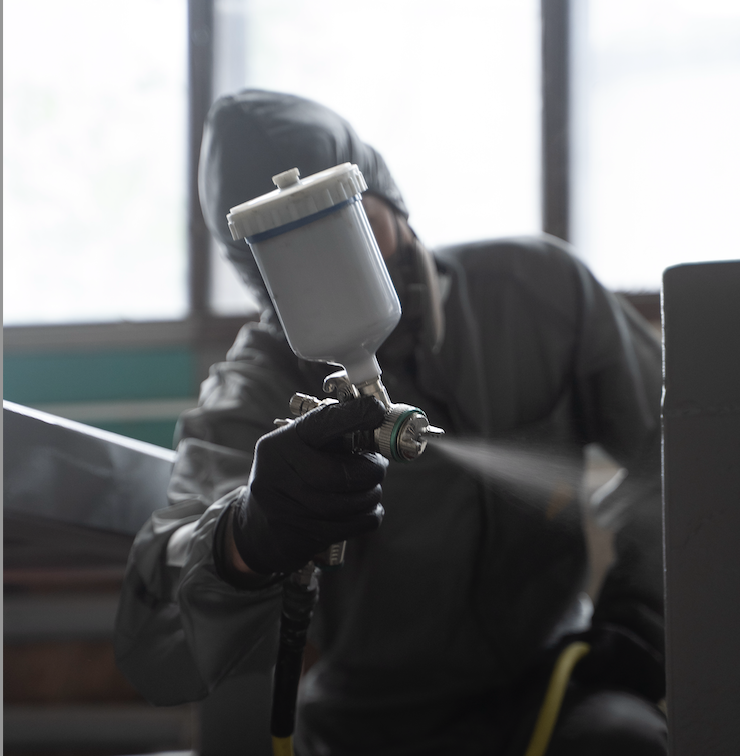
Replacement Filters & Repair Kits
Stock up on genuine Sewinfla fiberglass pre-filters, activated carbon filters, fabric repair kits, and zipper replacement parts. US-stock, ships same day.
Shop Maintenance SuppliesRelated Guides
- How to Replace Carbon Filters — step-by-step filter service and the replacement schedule.
- Ventilation Design: Exhaust Fans & Airflow Optimization — intake and exhaust geometry for dead-zone-free booths.
- How an Inflatable Paint Booth Works — the airflow circuit and activated-carbon filtration explained.
- 210D vs 420D vs PVC: Material Comparison — what each fabric property is and how it is measured.
- How to Paint a Car in an Inflatable Paint Booth — the full walk-around respray workflow, from sizing to spray order.